Phabricator是一套基于Web的软件开发协作工具,包括代码审查工具Differential,资源库浏览器Diffusion,变更监测工具Herald,Bug跟踪工具Maniphest和维基工具Phriction。Phabricator可与Git、Mercurial、Subversion集成使用。
环境:

首先搭建LNMP环境:
1.安装MySQL
1.1安装(需要5.5或更新的版本):
1 | #wget http://dev.mysql.com/get/mysql-community-release-el7-5.noarch.rpm |
安装成功后重启mysql服务:
1 | #service mysqld restart |
首次登录没有密码:
1 | #mysql -u root |
设置密码,无需重启即可生效:
1 | mysql> set password for 'root'@'localhost' =password('password'); |
2.安装PHP
需要5.5或更新的版本
2.1编译源码:
新建一个目录,下载源码并解压:
1 | #mkdir /twy |
安装依赖库:
1 | #yum install gcc automake autoconf libtool make –y |
在解压目录执行configure后执行make install:
1 | #cd /twy/php-5.6.30 |
2.2 php.ini配置
首先将刚才解压的文件夹中将php.ini-development拷贝到/usr/local/php/lib目录并命名为php.ini:
1 | #cp /twy/php-5.6.30/php.ini-development /usr/local/php-5.6.30/lib/php.ini |
打开配置文件
1 | vim /usr/local/php-5.6.30/lib/php.ini |
修改以下内容:
1 | always_populate_raw_post_data = -1 |
2.3 php-fpm.conf配置
首先将/usr/local/php-5.6.30/etc/php-fpm.conf.default拷贝一份并命名为php-fpm.conf:
1 | #cd /usr/local/php-5.6.30 |
接着对php-fpm.conf做如下更改( 注意:不能另外加这几句,只能在原语句上去掉注释后修改):
1 | ;pid = run/php-fpm.pid这一句取消注释,并改为:pid = /usr/local/php-5.6.30/var/run/php-fpm.pid; |
2.4 启动PHP:
1 | #/usr/local/php-5.6.30/sbin/php-fpm |
查看端口是否在监听:
1 | [root@localhost nginx]# netstat -lntp | grep 9000 |
关闭php-fpm:
1 | kill -INT `cat /usr/local/php5/var/run/php-fpm.pid` |
或者
1 | pkill php-fpm |
ps:可以用PHP -v看下现在用的是不是你安装的php,有时用的是系统自带的,启动phabricator后还是不能查看那个访问页面。执行这条语句可以使用自己安装的:
1 | ln -s /usr/local/php-5.6.30/bin/php /usr/bin/php |
3.安装nginx
3.1 gcc 安装
安装 nginx 需要先将官网下载的源码进行编译,编译依赖 gcc 环境,如果没有 gcc 环境,则需要安装:
1 | yum install -y gcc-c++ |
3.2 PCRE pcre-devel 安装
PCRE(Perl Compatible Regular Expressions) 是一个Perl库,包括 perl 兼容的正则表达式库。nginx 的 http 模块使用 pcre 来解析正则表达式,所以需要在 linux 上安装 pcre 库,pcre-devel 是使用 pcre 开发的一个二次开发库。nginx也需要此库。
1 | yum install -y pcre pcre-devel |
3.3 zlib 安装
zlib 库提供了很多种压缩和解压缩的方式, nginx 使用 zlib 对 http 包的内容进行 gzip ,所以需要在 Centos 上安装 zlib 库。
1 | yum install -y zlib zlib-devel |
3.4 OpenSSL 安装
OpenSSL 是一个强大的安全套接字层密码库,囊括主要的密码算法、常用的密钥和证书封装管理功能及 SSL 协议,并提供丰富的应用程序供测试或其它目的使用。
nginx 不仅支持 http 协议,还支持 https(即在ssl协议上传输http),所以需要在 Centos 安装 OpenSSL 库。
1 | yum install -y openssl openssl-devel |
3.5下载nginx并编译
1 | #wget -c https://nginx.org/download/nginx-1.10.1.tar.gz |
nginx常用命令:
1 | nginx -s stop 快速关闭Nginx,可能不保存相关信息,并迅速终止web服务。 |
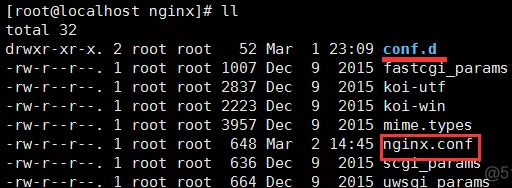
3.6配置nginx:
默认配置文件是nginx.conf,可以在这里面配置,但是如果把所有内容都放在nginx.conf里就太乱了,我们可以把其他的配置内容放在conf.d目录下。只要你的默认配置中把conf.d目录include进去就行了。

在conf.d中新建一个pha.example.com.conf,内容如下:
server {
server_name phabricator.example.com;#域名
listen 端口(记得加到防火墙里);
root     你下载phabricator的目录/phabricator/webroot;

location / {
    index index.php;
    rewrite ^/(.*)$ /index.php?__path__=/$1 last;
}

location /index.php {
    fastcgi_pass   127.0.0.1:9000;
    fastcgi_index   index.php;

    #required if PHP was built with --enable-force-cgi-redirect
    fastcgi_param  REDIRECT_STATUS    200;

    #variables to make the $_SERVER populate in PHP
    fastcgi_param  SCRIPT_FILENAME    $document_root$fastcgi_script_name;
    fastcgi_param  QUERY_STRING       $query_string;
    fastcgi_param  REQUEST_METHOD     $request_method;
    fastcgi_param  CONTENT_TYPE       $content_type;
    fastcgi_param  CONTENT_LENGTH     $content_length;

    fastcgi_param  SCRIPT_NAME        $fastcgi_script_name;

    fastcgi_param  GATEWAY_INTERFACE  CGI/1.1;
    fastcgi_param  SERVER_SOFTWARE    nginx/$nginx_version;

    fastcgi_param  REMOTE_ADDR        $remote_addr;
  }
}
启动nginx
1 | #/usr/sbin/nginx -c nginx.conf所在的目录/nginx.conf |
将phabricator下载到一个目录下,配置nginx和mysql会用到这个目录。
1 | somewhere/ $ git clone https://github.com/phacility/libphutil.git |
4.1 phabricator连通mysql
到phabricator的安装目录下:
1 | ./bin/config set mysql.host 'localhost' |
5.邮件设置
5.1 配置邮件发送来源
1 | bin/config set metamta.default-address admin@example.com |
5.2 生成 mailers.json 文件:
1 | #cat << EOF > mailers.json |
5.3 导入邮件 smtp 配置
1 | bin/config set cluster.mailers --stdin < mailers.json |
5.4 发送测试邮件:
1 | #bin/mail send-test --to lb@example.com --subject hello < mailers.json |
6.设置管理员和认证方式
这时,浏览器应该可以访问Phabricator了: http://mydomain.com
作为第一个访问用户,可创建管理员账号。
注意,管理员不是标准用户。
如果能创建管理员,说明安装过程成功。
这时可以添加认证方式(Auth Provider)。phabricator提供了多种认证方式,其中最基本的是用户名/密码的provider。
作为管理员,在主页左侧栏选择Auth,访问Auth,选择Add Provider ,然后添加 Username/Password Provider即可。
7.Phabricator中文汉化
进入phabricator/src/extensions/目录下,rm -fr README,再执行下面git命令,然后在客户端设置里,选择语言中文即可.
1 | git clone https://github.com/wanthings/phabricator-zh_CN.git ./ |
8.配置完成后,进入web页面左上角有很多杂项,可根据提示修改即可:
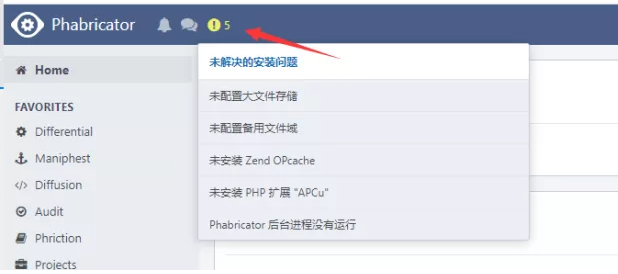
至此,Phabricator服务部署完成。