公司之前翻墙一直是购买的梯子,由于泄密原因,决定自己购买海外VPS来部署v2ray服务,在此记录下整个过程。
服务提供商
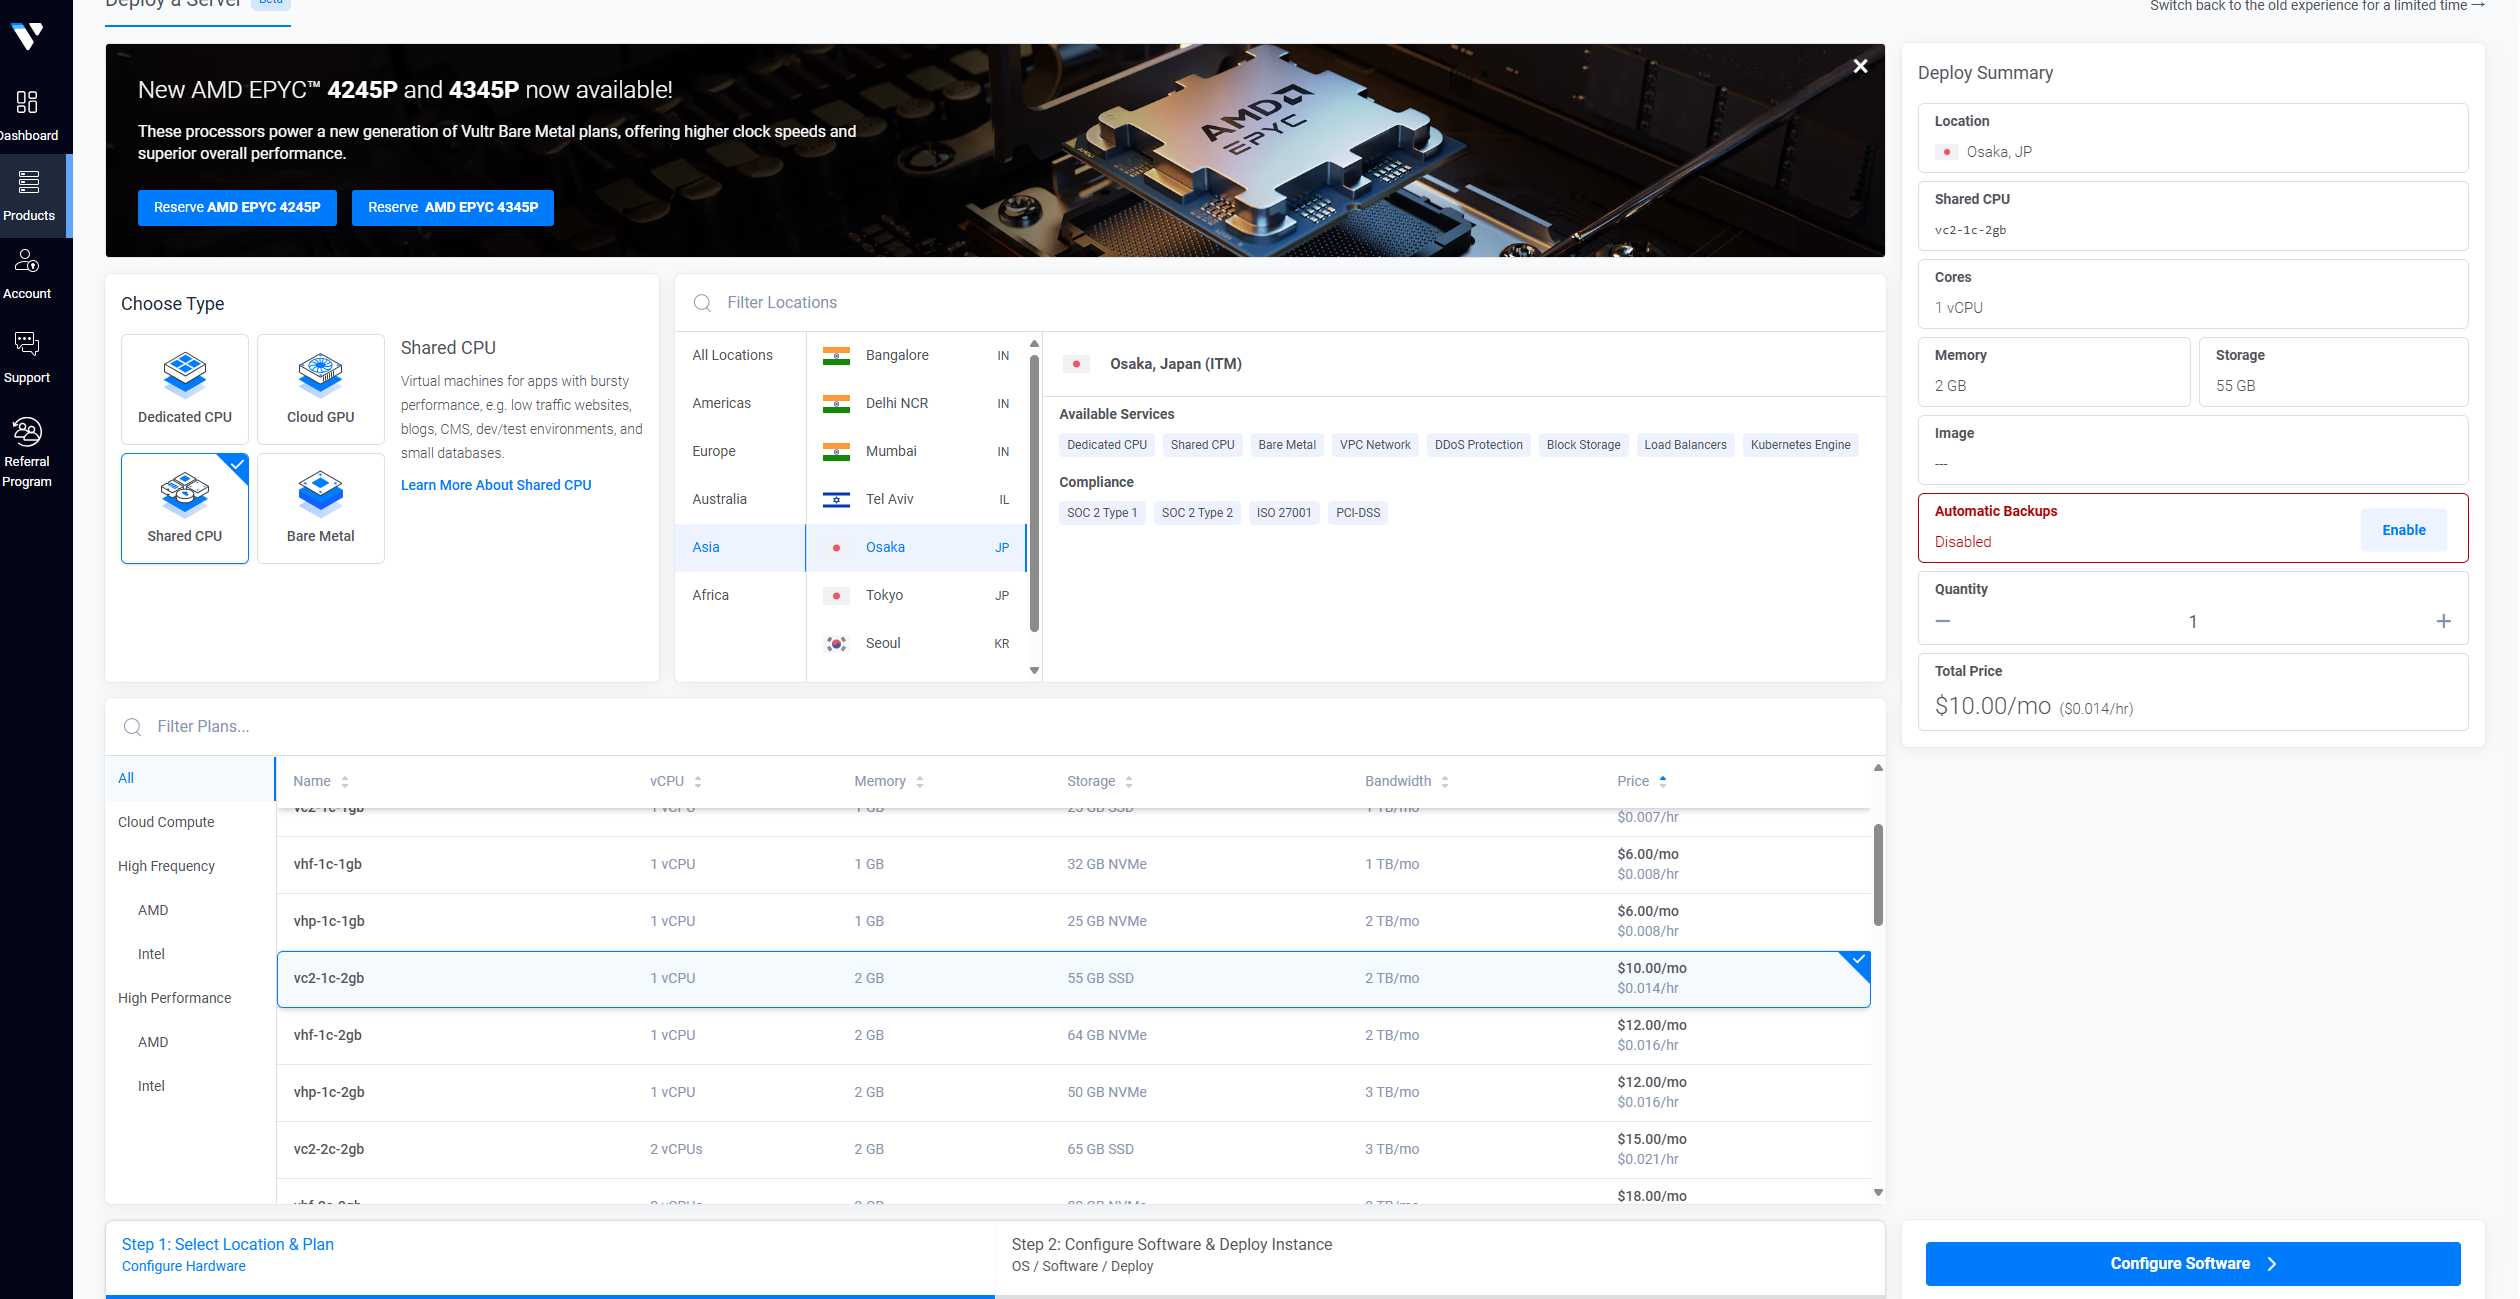
Vultr稍微优惠点,而且如果ip被墙了,可以直接销毁vps,重新创建,就可以获得新的ip,相当于免费换ip,搬瓦工换ip是收费的,折算成人民币大概是五十多块。
所以在此使用的是Vultr的服务,直接注册账号,充值之后选择对应配置,开通就行(这里有个坑,如果使用支付宝支付的话,国家选择中国,网络不可以使用代理,不然会报错,支付不了)
流量伪装介绍
直接使用tcp配置就相当于裸奔,估计没一会就得被墙,本文介绍的V2ray伪装便是将穿墙流量以常见的HTTPS/TLS包装,大大降低vps被墙或被干扰的可能性,在敏感时期提供稳如狗的上外网体验。
关于伪装技术的选择,V2ray web+websocket+tls 和 V2ray web+http2+tls 常用来做对比。理论上http2省去了upgrade的请求,性能更好。但实际使用中两者没有明显区别,加之某些web服务器(例如Nginx)不支持后端服务器为http2,所以websocket的方式更流行。如果你要上http2,记得web服务器不能用Nginx,要用支持反代http2的Caddy等软件。
理论上来说,证书不是必须的。但没有tls加持或不做加密,防火墙直接能看出来流量真实意图从而进行干扰,这也是为什么不建议伪装http流量的原因。本文给出的方法采用合法机构签发的证书对流量进行加密,不是做特征混淆得到的TLS流量,从而更难被检测和干扰。
下文介绍流量伪装的配置步骤,演示域名为tlanyan.pp.ua,服务器为Linux(CentOS),web服务器软件用Caddy,web+websocket+tls组合,最终效果为:http/https方式打开域名,显示正常的网页;V2Ray客户端请求特定的路径,例如https://itlanyan.com/awesomepath,能科学上网;浏览器直接请求https://itlanyan.com/awesomepath,返回”400 bad request”。即外部看起来完全是一个人畜无害的正规网站,特定手段请求特定网址才是科学上网的通道。
服务部署准备
域名
一个域名,无备案要求,可以在DigitalPlat平台注册一个免费的二级域名,可以解析,但是不能转让,可以免费续期。
cloudflare
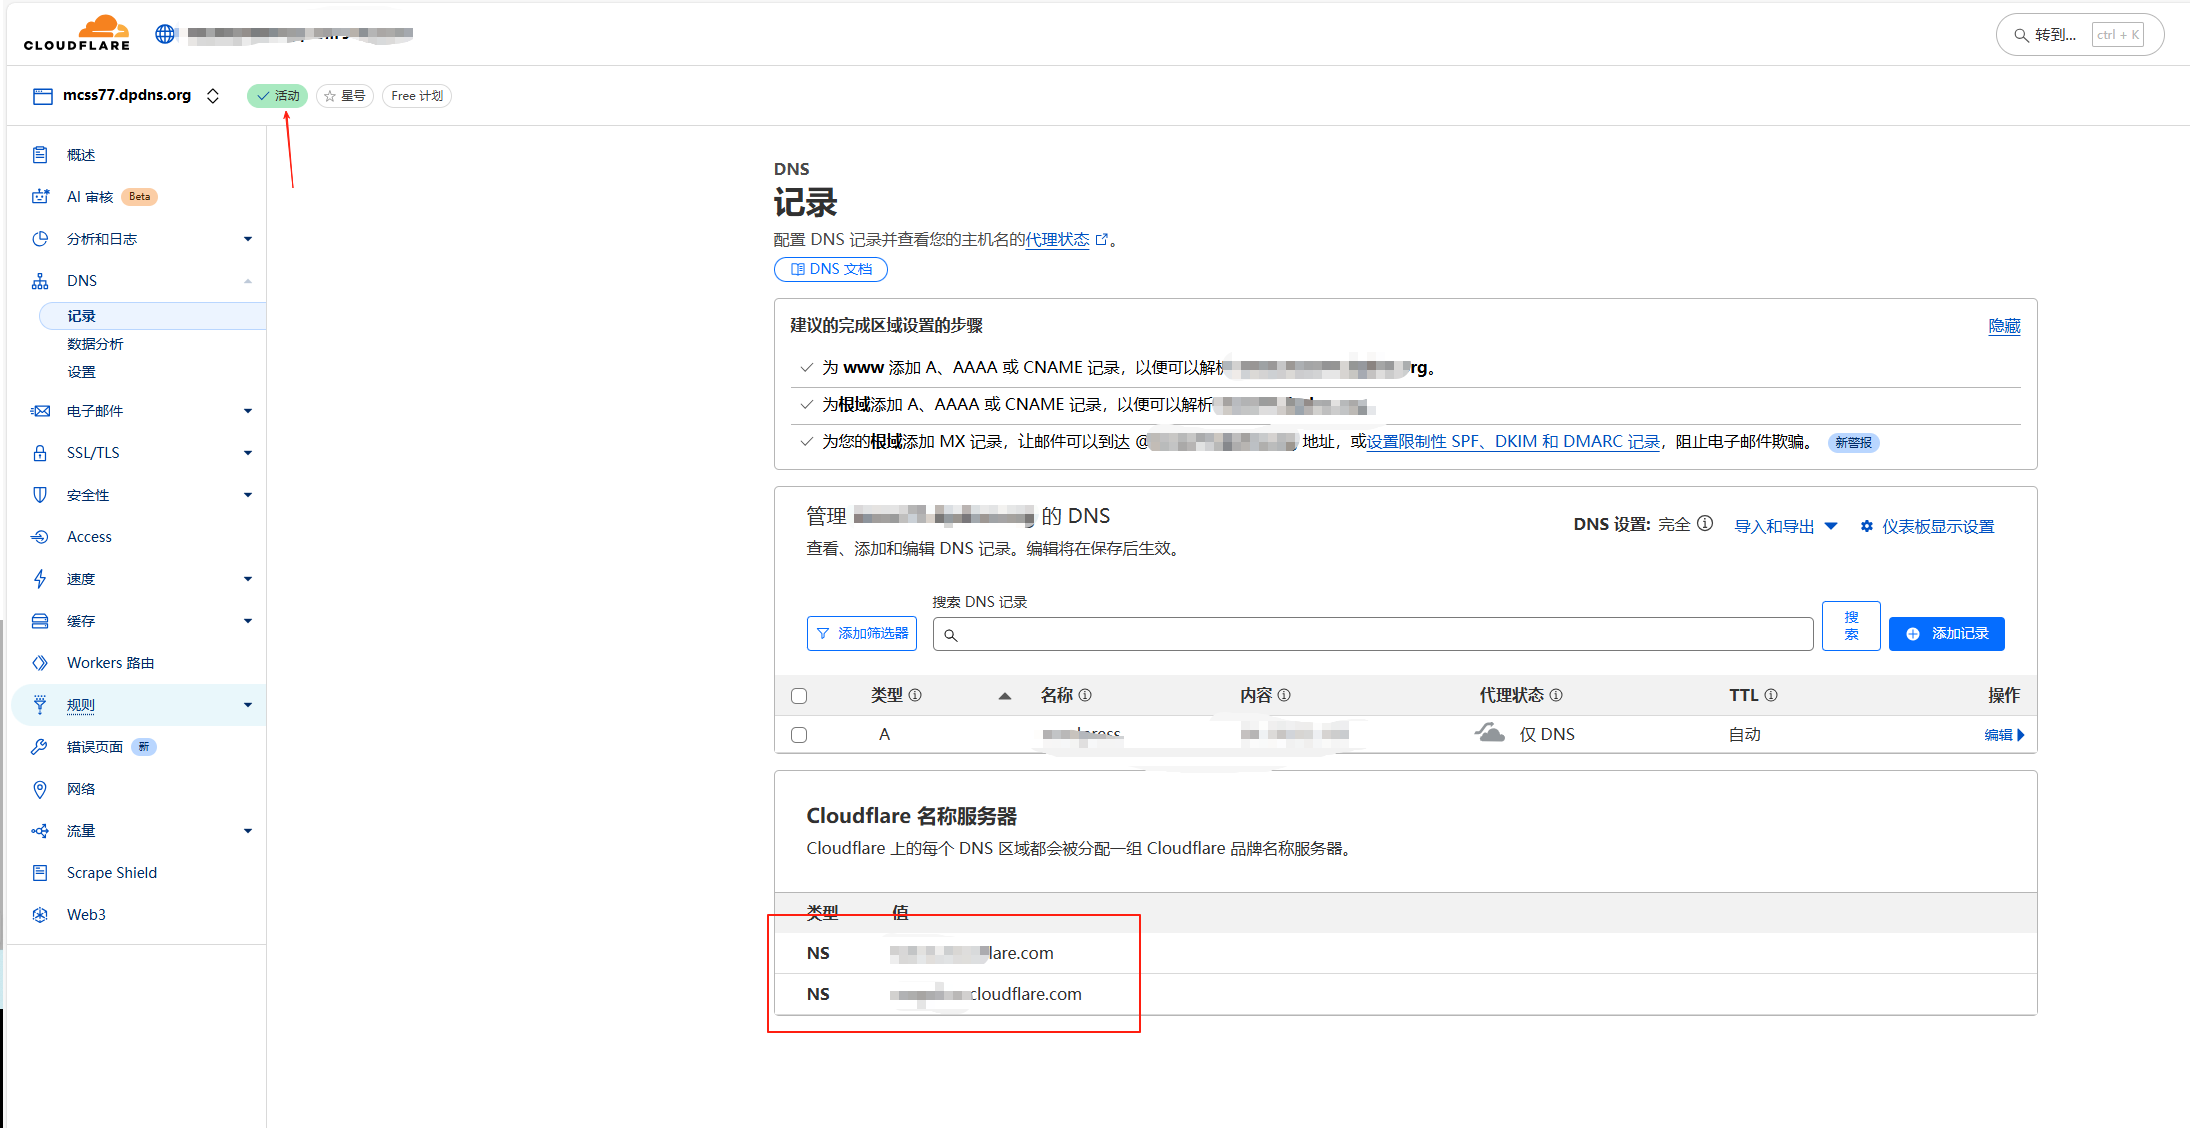
在DigitalPlat注册的免费域名不可以直接在上面添加解析,需要托管在cloudflare平台。
在cloudflare添加一个域,选择免费的计划即可,会生成两个ns记录,添加到DigitalPlat平台申请的免费域名里即可。

生效后状态为活动:
V2ray服务部署
登录vps服务器,初始化环境:
1 | systemctl stop firewalld |
配置安全组
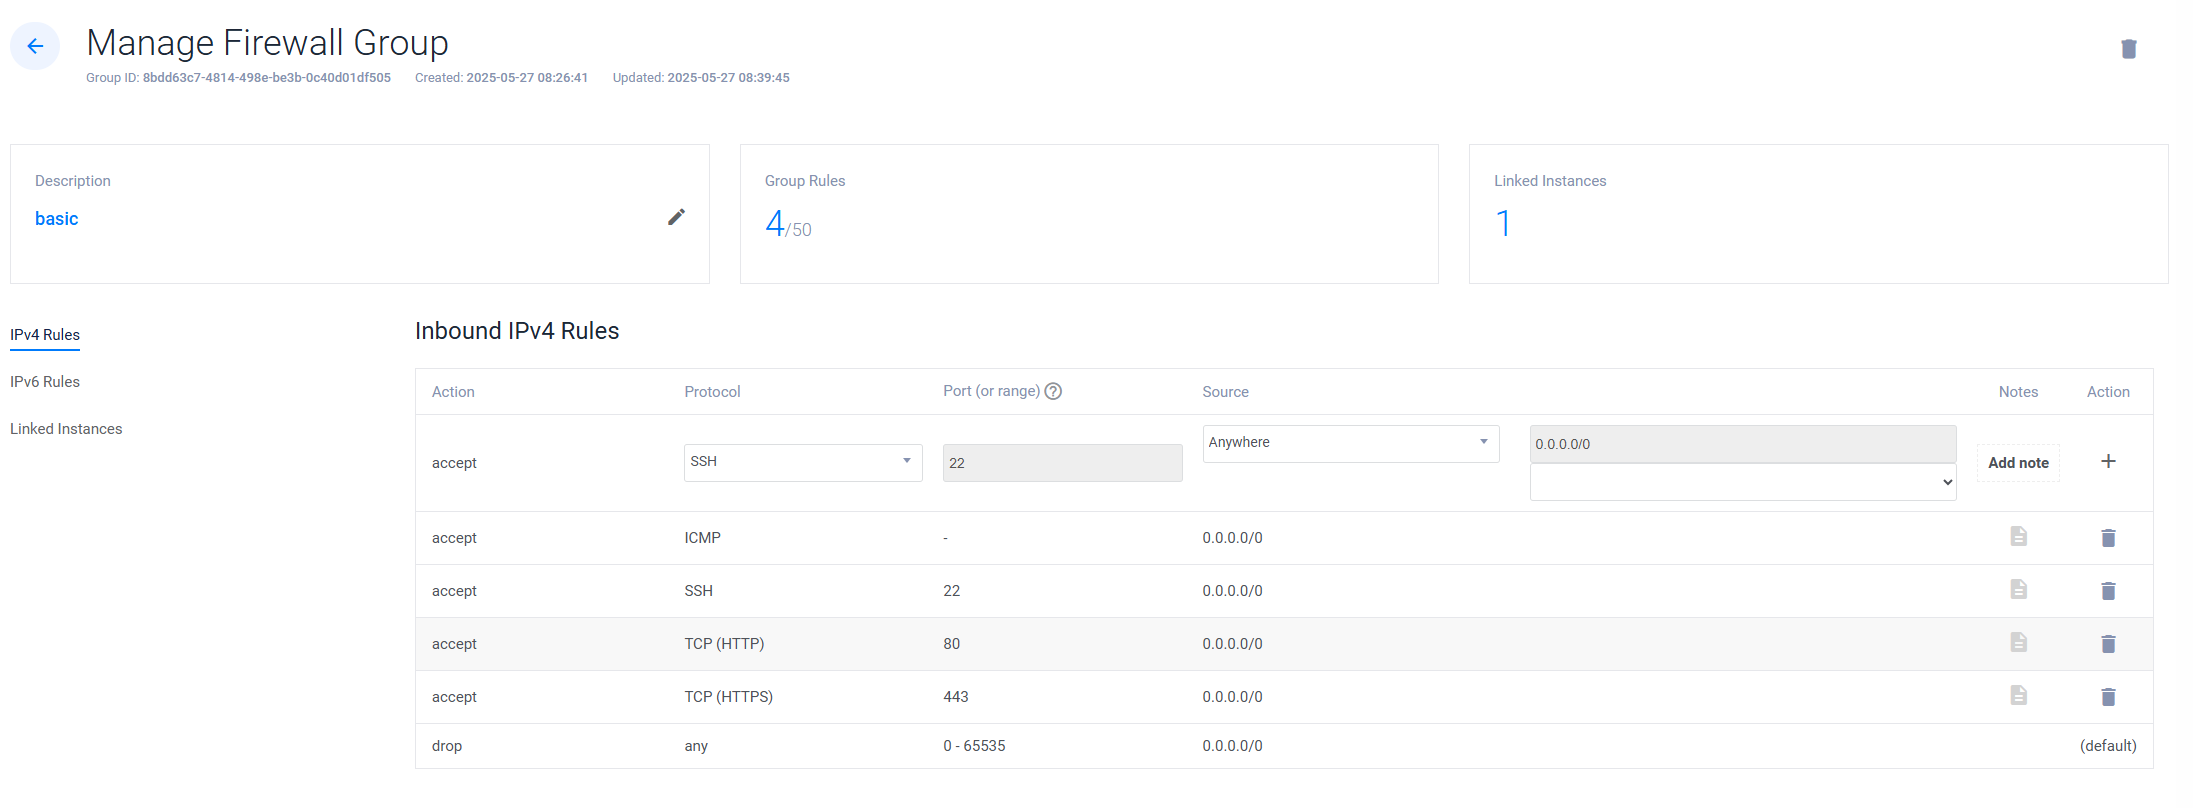
安全起见,登录Vultr平台添加安全组,只放开22,80,443端口。
安装v2ray服务:
1 | bash <(wget -qO- -o- https://git.io/v2ray.sh) |
或者自己创建一个v2ray.sh脚本:
1 |
|
安装完成
执行了上面的安装命令,并且没有错误提示的话,就能看到类似下面的图片
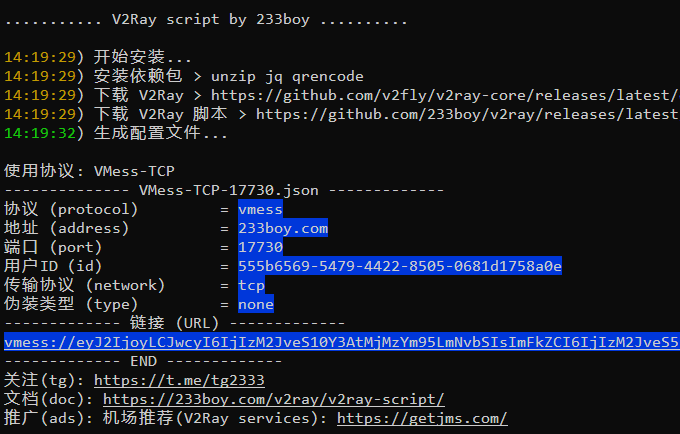
此时可以复制 URL 到相关软件 (例如 v2rayN) 去测试一下是否正常使用,记得安全组要放开对应端口,但是这个是没有伪装的,很容易被墙,所以我们不用这个,继续下面的步骤。
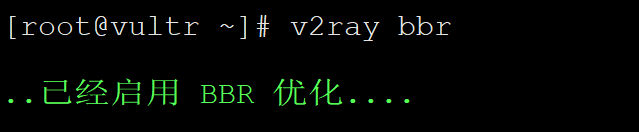
打开 BBR 优化
1 | v2ray bbr |
开启流量伪装
1 | v2ray add ws |
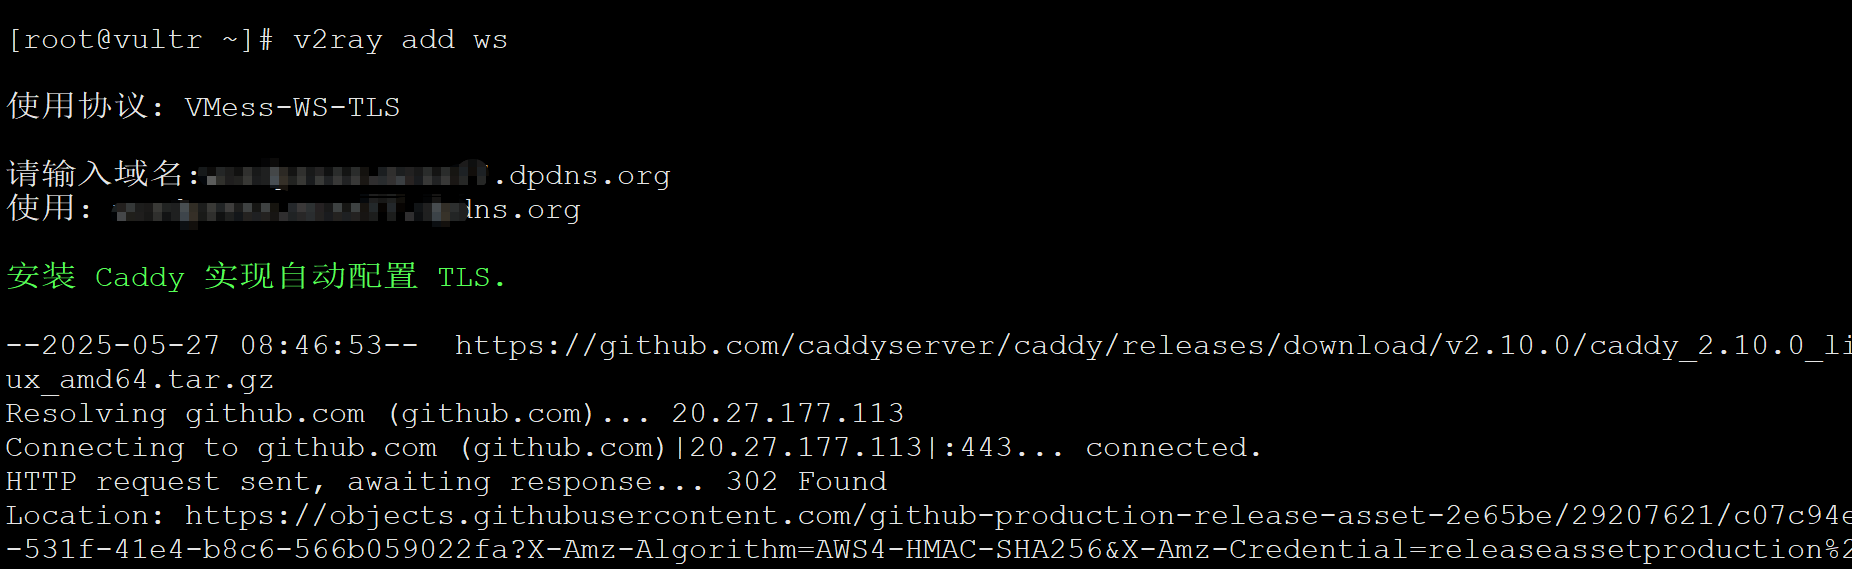
复制链接到客户端测试一下是否正常使用
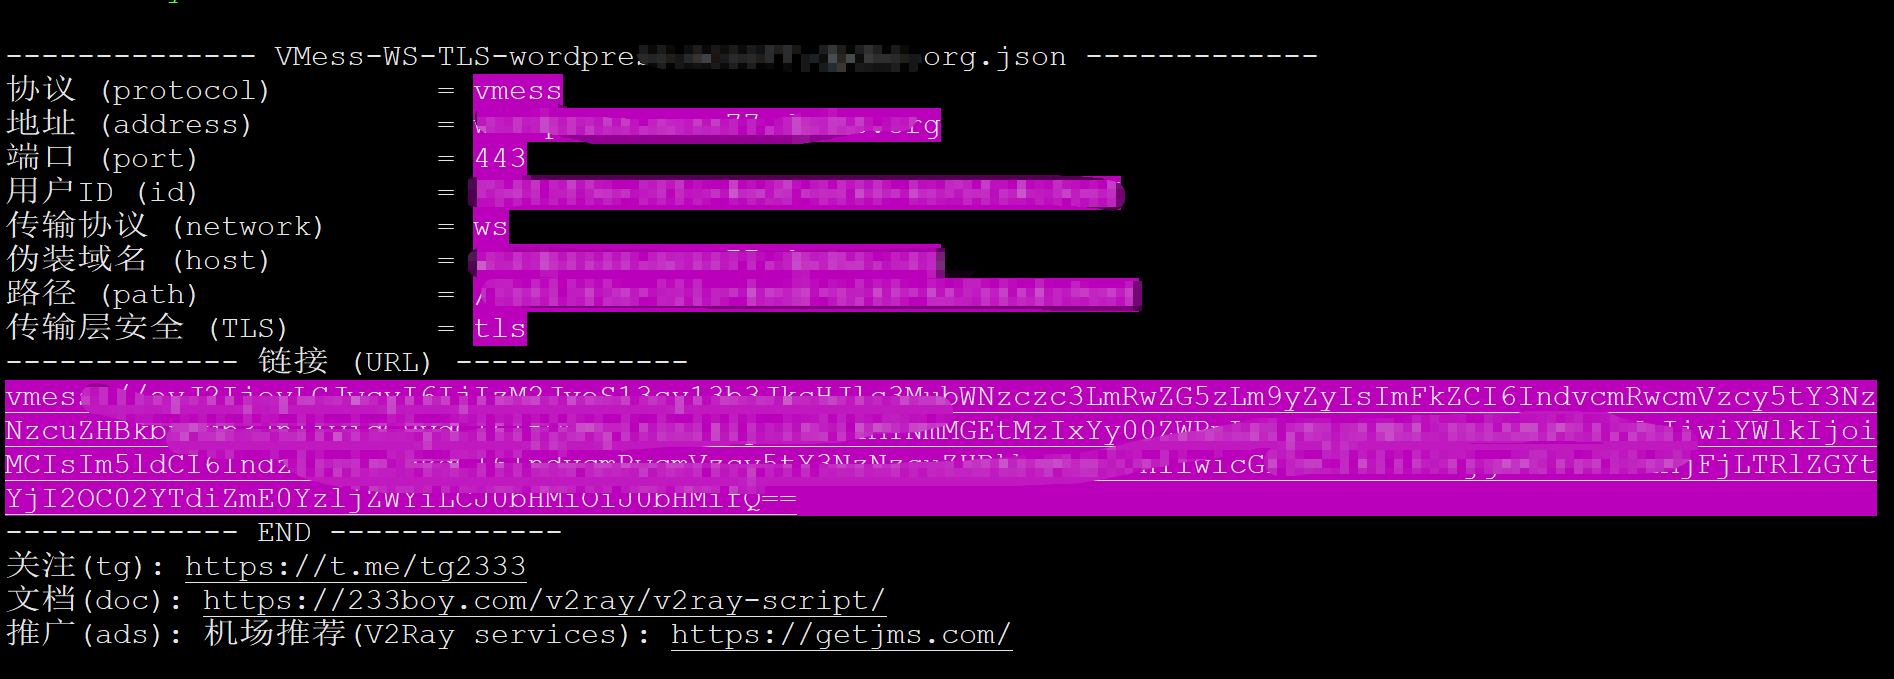
至此,v2ray服务就部署完成了。
流量伪装+CDN
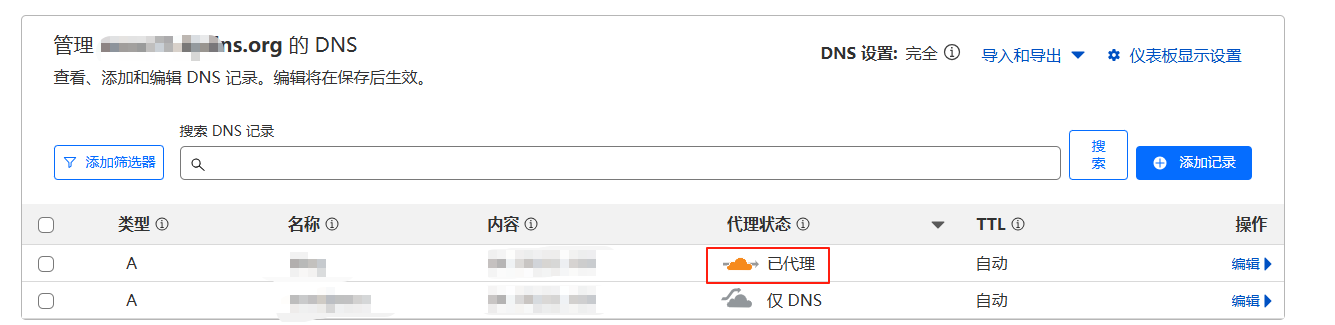
即使使用了流量伪装,还是可能会被封ip,可以利用 CDN 中转,cloudflare就有免费的,在cloudflare配置域名解析的时候打开代理(小云朵)即可。
这时流量传递的顺序是这样的:

主要实现就是两点:
一、借助 V2Ray 代理,将我们的流量被伪装成网站流量
二、利用 CDN 中转 V2Ray 的 WebSocket 流量
这样,GFW 只知道你与 CDN 之间的联系,不知道 VPS 的实际地址,并且 CDN 会有很多 IP 地址,GFW 也不会随意封这些 IP,毕竟也有很多正规网站在使用。
优点:不怕ip被封,因为CDN的ip是在海外的,即使我们的vps ip已经被封了也可以使用。
缺点:网速会慢很多。
测试ip端口是否被墙
网站1:https://www.toolsdaquan.com/ipcheck/#google_vignette
V2ray客户端
下载地址:https://itlanyan.com/v2ray-clients-download/
后续使用
流量伪装方式也不是百分百万无一失,还是有可能被墙,如果ip被墙的话,我们就需要更换ip(重建vps),但是如果重建服务器就需要重新配置v2ray服务,那生成的配置也会变化,每次都得把生成的链接给同事们去替换的话就很麻烦,所以这里提供两种方式,无需客户端修改配置。
方式一:
v2ray服务部署好之后,登录vultr平台打个快照,如果原ip被墙,就使用此快照去创建一个新的服务器,新服务器的v2ray服务配置不会更改,只需要登录到cloudflare平台把域名解析记录修改为新的ip即可。

快照是收费的,0.05美元/G/月。
方式二:
搞个个人订阅,一般情况下 ss, ssr, v2ray 之类的分享链接去掉前缀以后都是一个 base64 的字符串
而且一般我们常见的订阅链接,里面的内容虽然一看都是乱码。但是它其实也是一条或多条分享链接再进行一次 base64 编码后的字符串,比如 ss, ssr, v2ray, clash, qv2ray。
假设分享链接为:
1 | vmess://eyJob3N0IjoiamlrZS1henNnMDIuZGRucy1vbmx5Lnh5eiIsInBhdGgiOiIvamlrZSIsInRscyI6IiIsInZlcmlmeV9jZXJ0Ijp0cnVlLCJhZGQiOiJqaWtlLWF6c2cwMi5kZG5zLW9ubHkueHl6IiwicG9ydCI6MzA1MDMsImFpZCI6MiwibmV0Ijoid3MiLCJoZWFkZXJUeXBlIjoibm9uZSIsInYiOiIyIiwidHlwZSI6InZtZXNzIiwicHMiOiJWNC3mlrDliqDlnaHlvq7ova/kupEwMXx2MnJheSIsInJlbWFyayI6IlY0LeaWsOWKoOWdoeW+rui9r+S6kTAxfHYycmF5IiwiaWQiOiJlZDYyMDE2ZS1lM2NhLTM0N2YtOGY0Ni1iYzczMzRmYjliYmYiLCJjbGFzcyI6MX0= |
把分享链接去掉前缀保存到一个文件中:

通过使用 base64 -d 对原本的链接进行解密,我们可以获得如下信息

可以看到解码后就是v2ray的节点配置信息。
所以我们可以把分享链接保存到一个文件file1里,对文件进行加密:
1 | base64 -w 0 file1 |

然后把加密后的内容保存到另一个文件file2中并把file2放到一个web服务器上作为订阅链接,在客户端配置这个订阅链接就可以拉取节点配置信息。
如果ip被墙了,在新的服务器上配置了新的v2ray的话,会有新的配置信息:

把新的分享链接进行加密,然后把加密后的内容替换web服务器的file2的内容,然后在客户端更新订阅就可以更新为新的节点配置。
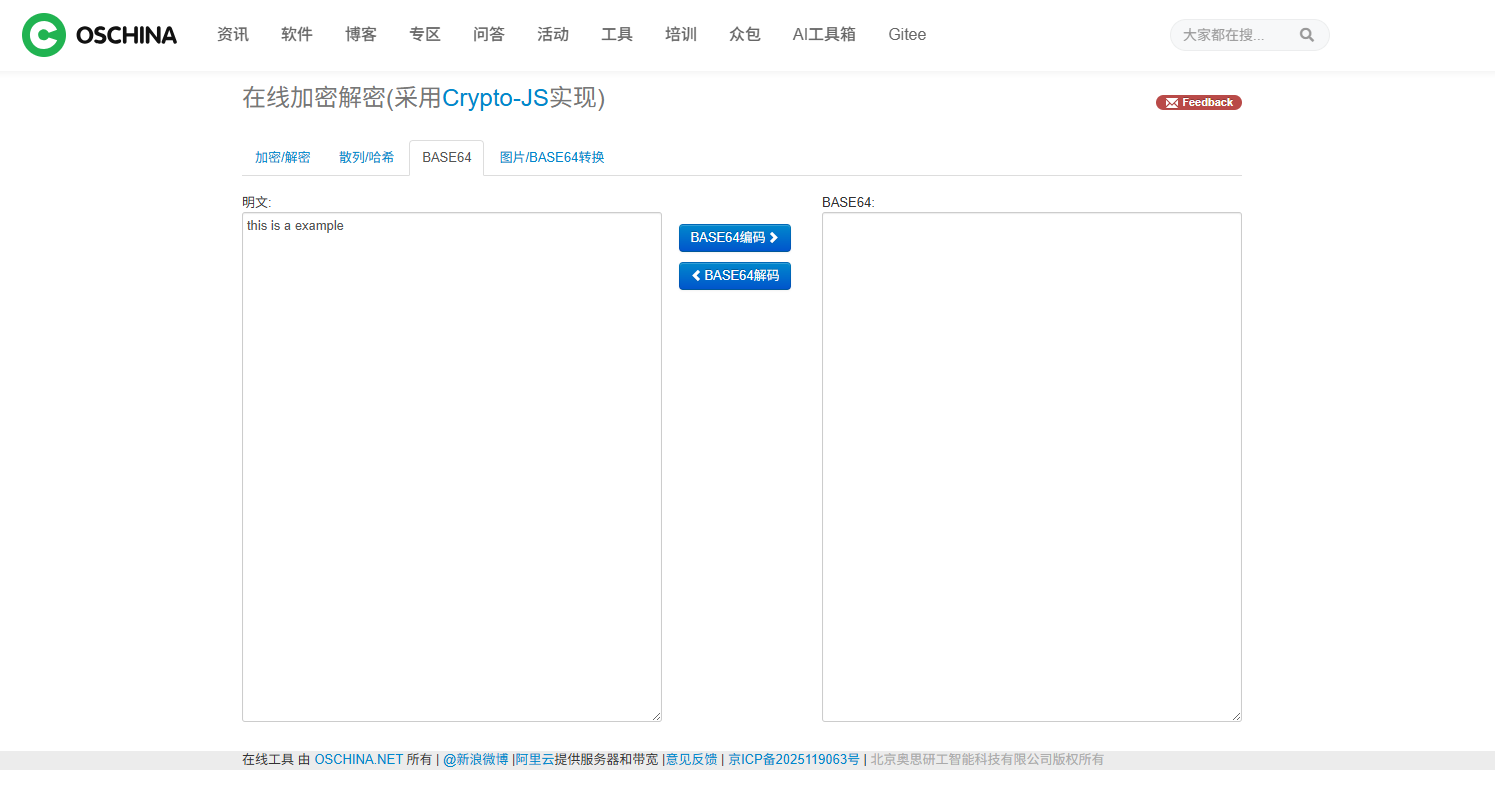
也可以在在线网站OSCHINA对内容进行加解密。